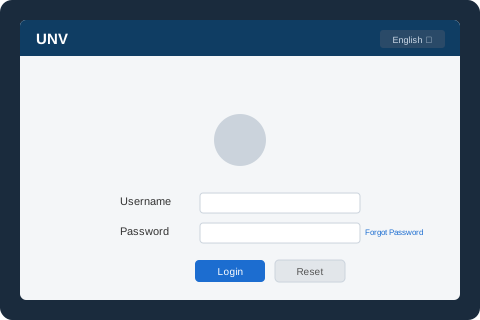
This guide is based on Uniview's own official deployment documentation. For the literal interface screenshots (login screen, network settings, device management), see the official Uniview Video Intercom Deployment Guide (PDF).
What you'll need
- UNV indoor station (e.g. OEI-371S-H-W or similar) and matching door station
- A PoE switch or PoE injector for power over the network cable
- A phone or PC on the same local network for initial setup
Step-by-step configuration
Step 1 — Find all devices on the network
Connect the indoor station, PoE switch, and door station according to the wiring diagram in the box, then power everything on. Use UNV's EZTools desktop application (free from Uniview) to auto-discover every UNV device on your local network — this saves you from hunting for IP addresses manually and is the fastest way to confirm all devices powered on correctly.
Step 2 — Find each device's IP address
Most UNV door stations and cameras ship with a default static IP in the
192.168.1.xrange — check the label on the device itself, or read it directly from the EZTools device list rather than guessing. Note the IP of the indoor station, door station, and any linked cameras before continuing.Step 3 — Change the IP address (if needed)
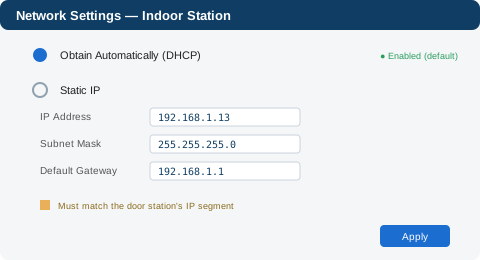
DHCP is enabled by default on the indoor station, assigning an IP automatically. For a permanent installation, switch to a static IP instead so the address never changes after a router restart. Whichever method you use, the door station, indoor station, and any linked network cameras must all sit on the same IP segment (e.g. all starting
192.168.1.x), or the call and live-view functions won't work. This single mismatch causes the majority of "devices won't connect" support calls.Step 4 — Log in to the door station
Open a browser and enter the door station's IP address directly (e.g.
http://192.168.1.13). Log in with the administrator account. On first login, UNV devices use a default admin password (commonly123456on current models — always confirm against your specific unit's quick-start guide, as this can vary by firmware version). Change this immediately.Step 5 — Configure the door station
Set the door station's device location (compound/building/unit/room). In multi-unit buildings, this location data is what prevents two apartments' intercoms from cross-linking to the wrong door station. Confirm the door station's protocol/room-number settings match what you'll enter on the indoor station in the next step.
Step 6 — Configure the indoor station
On the indoor station, follow the first-login wizard: set Wi-Fi (if used), time zone, and the indoor station type (main station or extension). The default location for a main indoor station is District 1, Building 1, Unit 1, Room 1 — update this to match your property's actual numbering.
Step 7 — Pair the door station with the indoor monitor
From the indoor station's device management screen, use the auto-search function to detect the door station on the network, then add it to the device list. If it isn't found, double check Step 3 — a mismatched IP segment is the most common cause. Network cameras can be added the same way if you want their feed viewable from the indoor station.
Step 8 — Test the call
Place a test call from the door station to the indoor station and confirm both video and audio work in both directions. Test at least twice from a cold start (door station idle, not already on a call screen) to rule out a one-off glitch.
Step 9 — Configure door unlock
Confirm the remote door release relay is wired and configured, then test it specifically — a working video call does not guarantee the unlock relay itself is correctly wired. Trigger the unlock from the indoor station during a test call and physically confirm the door latch releases.
Step 10 — Connect to your mobile phone
Install EZView (Uniview's mobile app) or UNV-Link — Uniview's newer app, which is replacing EZView (EZView service is expected to be phased out by 2027, so UNV-Link is the better long-term choice for new installs). Scan the QR code on the indoor station or door station to bind it to your account, enabling remote call answering and live view from your phone even when you're away.
Common problems and solutions
| Problem | Likely cause | Fix |
|---|---|---|
| Indoor station can't find the door station | IP segment mismatch (Step 3) | Confirm all devices share the same first three IP octets |
| Call connects but no audio | Speaker/mic muted or volume set to zero on one end | Check volume settings on both indoor and door station |
| Video call works but door won't unlock | Relay wiring issue, separate from network config | Re-check the physical lock relay wiring — this is Step 9, not a network problem |
| Mobile app won't bind to the device | QR code expired, or device not yet on the internet/cloud | Regenerate the QR code from the device's cloud/EZCloud settings and retry |
Expert tips
- If the door station can't be found during Step 5, it's almost always an IP segment mismatch — recheck Step 3 first before assuming a hardware fault.
- Use a static IP for any intercom on a permanent installation — a DHCP-assigned address can change after a router reboot and silently break the link between devices.
- Keep a note of the device location settings (building/unit/room) somewhere accessible — this is the first thing to check if a resident reports "wrong door" video calls.
Common mistakes
- Skipping the password change — leaving the default admin password active is a real security risk on a device that controls a physical door.
- Mixed IP segments — the single most common reason a freshly wired system "won't connect."
- Not testing remote unlock specifically — a working video call doesn't guarantee the door release relay is wired and configured correctly.
Frequently asked questions
Commonly 123456 on current models, but this can vary by firmware version — always check your specific unit's quick-start guide and change it immediately after first login.
This is almost always an IP segment mismatch. The indoor station, door station and any linked cameras must all be on the same network segment to communicate.
DHCP is fine for quick testing, but a static IP is recommended for any permanent installation, since a DHCP-assigned address can change after a router restart and break the device link.
A single indoor/door station pair is usually self-installable following the steps above. Multi-unit buildings with several linked stations benefit from professional configuration to avoid cross-linking between units — see our Intercom installation service.
For new installs, UNV-Link is the better choice — it's Uniview's newer app and EZView's service is expected to be phased out by 2027. Both work with the same account login if you're migrating from an existing EZView setup.
This is almost always a separate issue from the network/call configuration — check the physical door release relay wiring specifically (Step 9), since a working call doesn't confirm the unlock relay is wired correctly.
Summary
Configuring a UNV video intercom comes down to getting the network settings right first — same IP segment across all devices — then working through activation, location settings, device linking and a thorough test call. If you'd rather have it configured professionally, our Intercom installation service in Abu Dhabi includes full setup and testing.
Want it configured professionally?
Free site check and fixed-price quote within 24 hours.